
Hydraulic motors are essential components in hydraulic systems. These motors are responsible for converting hydraulic pressure into mechanical force and power, which are used to drive various machinery and systems. Like any mechanical component, hydraulic motors are subject to wear, which can lead to failure or loss of efficiency over time. To avoid costly repairs and system downtime, worn hydraulic motor components must be inspected and replaced regularly. In this article, we’ll provide a comprehensive guide on how to inspect and replace hydraulic motor components.
Types of Hydraulic Motors
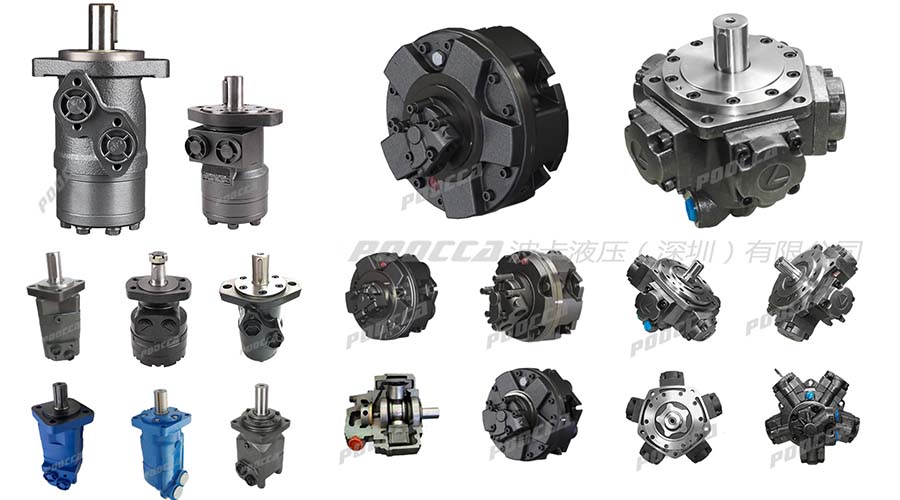
There are two main types of hydraulic motors: gear motors and piston motors. Gear motors are cheaper and simpler than piston motors, making them popular for low power applications. They rely on the movement of gears to convert hydraulic pressure into mechanical energy. Piston motors, on the other hand, are more costly and complex, but offer higher power density and efficiency. They consist of a rotating cylinder block with pistons that reciprocate with fluid flow to generate mechanical force and power. Knowing the type of hydraulic motor in your system is critical when inspecting and replacing worn parts.
Check hydraulic motor components
Before replacing any hydraulic motor components, a thorough inspection must be performed to identify the source of the problem. The following components should be checked:
1. Hydraulic oil: First check the hydraulic oil in the system. Look for any signs of contamination such as dirt, water or metal particles. Contaminated hydraulic fluid can damage hydraulic motor components, causing wear and failure.
2. Hoses and fittings: Inspect the hoses and fittings in the hydraulic system for signs of damage or wear. System leaks can affect the performance of hydraulic motors and reduce their efficiency.
3. Pump: The pump is the key component that provides hydraulic drive to the motor. Check for any signs of wear or damage such as leaks, noise, or reduced output.
4. Filters: Hydraulic system filters help remove contaminants from hydraulic fluid. Check the filter for signs of clogging or clogging.
5. Reservoir: The hydraulic oil reservoir should be inspected for any signs of contamination or damage. Make sure the fluid level is adequate for the system.
6. Motor: The hydraulic motor should be inspected for any signs of wear or damage such as leaks, noise, or reduced power output.
Replace Hydraulic Motor Parts
After identifying any worn or damaged hydraulic motor components, they must be replaced promptly to avoid further damage to the system. Here is a step-by-step guide on how to replace hydraulic motor components:
Step 1: Drain the hydraulic system
Before replacing any hydraulic motor components, you will need to drain the hydraulic fluid from the hydraulic system. Start by shutting down the hydraulic system and allowing some time for the fluid to settle. Then, locate the drain plug or valve and drain the fluid from the system. Make sure to dispose of hydraulic fluid properly as it can have a detrimental effect on the environment.
Step 2: Remove the hydraulic motor
Use a wrench to loosen and remove any hoses or fittings connected to the hydraulic motor. Next, loosen and remove any bolts or fasteners holding the motor in place. Carefully remove the hydraulic motor from the system.
Step 3: Disassemble the hydraulic motor
After removing the hydraulic motor from the system, disassemble carefully. Remove any fasteners or bolts holding the motor housing together. Carefully remove any internal components such as gears or pistons. Avoid damaging any parts during disassembly.
Step 4: Inspect parts for wear or damage
With the hydraulic motor removed, you can now inspect the various parts for wear or damage. Look for any pitting, nicks or signs of wear on the gears or pistons. Check the bearings for signs of corrosion or damage. Check the motor housing for any cracks or damage.
Step 5: Replace Worn or Damaged Parts
If any parts are found to be worn or damaged during the inspection, they will need to be replaced. Be sure to use the correct replacement parts for your hydraulic motor. Replace any worn bearings, gears, pistons or seals. If the motor casing is cracked or damaged, it may need a complete replacement.
Step 6: Reassemble the Hydraulic Motor
After replacing any worn or damaged parts, you can now reassemble the hydraulic motor. Reverse the disassembly process, making sure to tighten all fasteners to the manufacturer’s specifications. Make sure all seals or gaskets are in good condition and installed correctly.
Step 7: Install the Hydraulic Motor
With the hydraulic motor reassembled, you can now reinstall it into the hydraulic system. Connect any hoses or fittings to the motor, making sure they are properly tightened. Tighten any bolts or fasteners holding the motor in place to the manufacturer’s specifications.
Step 8: Refill the Hydraulic System
The final step in replacing hydraulic motor components is to refill the hydraulic system with hydraulic fluid. Follow the manufacturer’s recommendations for the type and amount of hydraulic fluid used. Make sure the fluid level in the reservoir is adequate.
Inspection and replacement of worn hydraulic motor components is critical to ensuring efficient operation of hydraulic systems. Regular inspections can help detect any problems before major damage occurs to the system. Following the step-by-step guidelines outlined in this article can help make the inspection and replacement process more manageable and ensure a quick return of the system to optimal working condition. Remember that when making any repairs or replacements to hydraulic motor components, it is critical to use the correct replacement part and follow the manufacturer’s specifications.
The motors sold by POOCCA include:A2FM,A6VM,AZMF,CA,CB,PLM,Danfoss OMM,OMP,OMS,OMT,OMH,OMR,Parker TG,TF,TJ
Post time: May-08-2023


